PLYO BOX
Most of the DIY plyo box tutorials out there are either too expensive or too complex to follow through.
If you want a DIY plyo box project that is:
-
- Easy to follow
- Minimalistic
- Most importantly has a budget of $45
You will love this guide.
Let’s dive in.
Updated Jan. 14, 2022
PLYO BOX
Most of the DIY plyo box tutorials out there are either too expensive or too complex to follow through.
If you want a DIY plyo box project that is:
- Easy to follow
- Minimalistic
- Most importantly has a budget of $45
You will love this guide.
Let’s dive in.
Updated Aug. 10, 2021
Have you seen the prices at which plyo boxes are going for nowadays?
A decent Plyo box can cost you close to $100.
Now, I can’t read minds but you probably have two thoughts in your head right about now.
- That’s way too much for a wooden box.
- I can do it myself for way cheaper than that.
You might be on to something..
If you plan on DIY-ing your Plyo box, it will cost you only $44.96 to be precise.
Now, I don’t want to walk you through the process of making a box.
If you’re into wood-working, chances are, you are already familiar with the technical know-how of measuring, cutting, drilling, and sanding.
You don’t need any help with that.
I could have made it cheaper, but that just compromises the quality and safety of the box, and I want you to construct a plyo box that you can actually compare to the premium market standard, which is the Rogue games box.
I will take you through:
1. The list of things you are going to need
4. Comparing your DIY plyo box with the Rogue games box
5. When should you not build a plyo box?
Let’s go.
List of things you’ll need
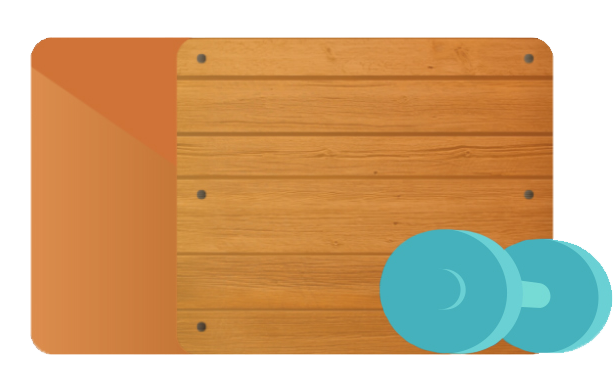
1. Plywood

The very first thing you are going to need for your wooden plyo box is obviously wood.
The best option here would be a tough pinewood since it is both sturdy and light, and fits right into our budget of $44.96.
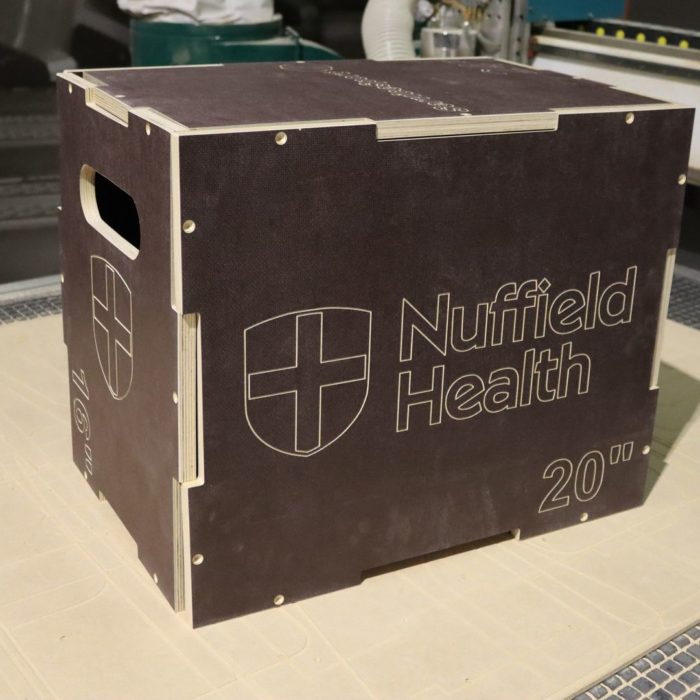
The economical option would be to buy a 4′ x 8′ sheet of plywood and get it cut to the precise measurements of the image below.
You can get the wood at Home Depot or Menard’s.

2. Screws

The second most important item after plywood would be the screws you would need to hold the plyo box together.
You could go with nails as well, but using a drill and these 2-inch screws is much more convenient.
3. Carpenter Square

The carpenter square will help you measure your cuts precisely, and make sure you don’t screw up your plyo box and have to go for another slab of plywood.
4. Glue Bottle
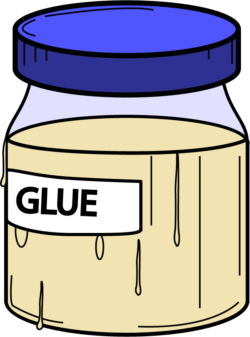
Although you would be using screws to hold your plyo box together, it is always a good idea to use a little bit of glue to reinforce the durability of your DIY plyo box.
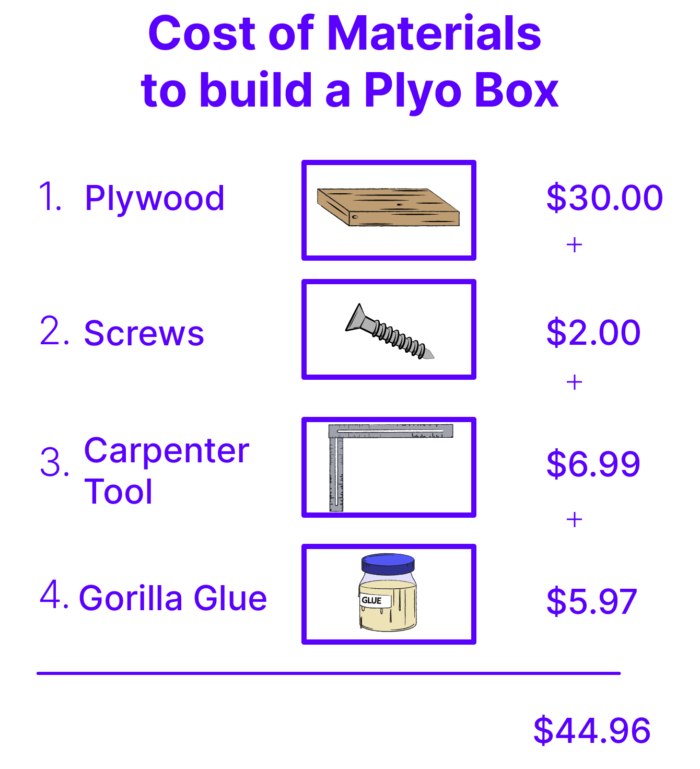
Feel free to download this image, and use it as a checklist for when you go to the hardware store.
DIY plyo box plan
Now, this is where the magic happens, this is where we make the plyo box.
Using a video here makes much more sense compared to a step-by-step picture guide.
You would be able to follow the instructions much more accurately and you can easily compare the progress of your plyo box with the one in the video at any stage.
The video walks you through all the necessary steps from cutting the plywood to sanding your plyo box to perfection.
Right here, where you stop reading, refer to the video, and actually make the box.
If you need to, go back to the shopping list to see whether you have everything you need.
Here is the video that takes you through how to make a plyo box.
Based on your woodworking skills, this can take you anywhere from 4 to 10 hours spread over a weekend.
In the video, you will notice special emphasis on the stability of the box, with each side being supported by at least two other sides and the strategic placement of the support braces.
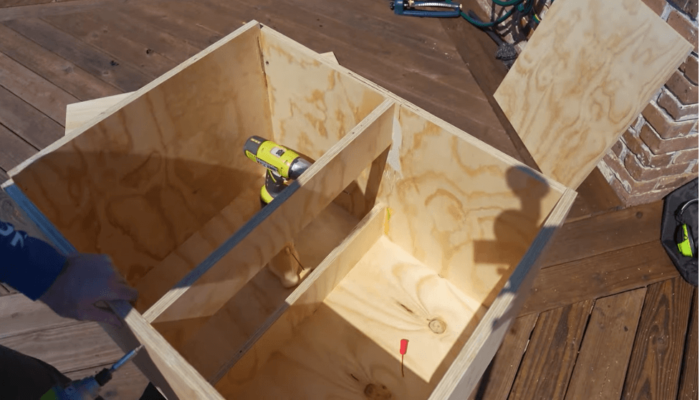
If you assemble a box, with just four rectangular pieces of wood, you will end up leaving the last side supported only by the screws, making it weak and susceptible to caving in.
Similarly, instead of just using a big slab of wood for the bracing, you can use two separate pieces of wood, helping you distribute the pressure better and making the box lighter.
This DIY plyo box will be able to handle a solid 200 pounds, and then some.
Now, by this part of the guide, you should have at least something that looks like a sturdy box.
That’s a job well done.
You have successfully saved yourself at least $100, if not more.
Before you actually start working out on the box though, you might want to test it.

Start by putting some heavy weights on it or sitting on it to make sure it does not give in. You can also try jumping on to it, but proceed with caution.
After you’ve tested plyo box, you can finally start using it for your workouts.
With the plyo box structure complete, we move on to the most important part of the project.
Safety Considerations
Yeah, you might think what harm can an inanimate block of wood cause you..
An ever-present hazard of working with wood is the splinters.
Splinters can also be a menace while you’re using the plyo box, so make sure you sand all the edges and handle holes thoroughly to further avoid any splinter-related injury.

Sanding will also help you spare your shins from a world of scraping (for the times when you miss your landing).
Some additional safety considerations besides sanding:
- Your Plyo box also needs to be stable and balanced.
- Make sure it is stable on all three sides and does not tip over while jumping.
- You can also coat the jumping surfaces with anti-slip paint or dig grooves into them to make your box safer and prevent you from slipping during your workout.
- Finally, make sure all nails and screws are flush with the surface or countersunk.
You don’t want to be practicing your vertical jumps and have a stray nail on the jumping surface dig into your shin.
Let’s compare our $20 DIY plyo box to the $135 Rogue Plyo games box
Here is a quick showdown of how your DIY plyo box stacks up against the Rogue games box.

Looks
When it comes to looks, the only thing you might miss in your DIY plyo box is the rogue logo.
But you can ignore that since your DIY plyo box gives you the freedom of customizing it yourself.
You can add your own branding to it, put on a fresh coat of paint anytime you like, customize the size of the box to your liking, and even engrave your initials on it.
If you try doing any of those on the Rogue Games Box, you will probably end up voiding its warranty.
Cost
Your DIY plyo box costs $40 and a couple of hours of effort compared to the $135 price tag of the Rogue Games box.

That’s a 3x price difference for you right there.
Now that doesn’t take anything away from the quality and durability of the Rogue Games Box, and it would probably pay for itself in the years to come.
But if you don’t want to make that much of an investment, the DIY plyo box is your best bet.
Safety
As consistent with all DIY gym equipment, your plyo box might not be as safe as the one from Rogue.
It ultimately comes down to how much effort and attention you have put into the box and how solid the construction is.
The same goes for durability.
You cannot put both the plyo boxes head to head and expect your DIY plyo box to come out on top.
The Rogue games box has years of research and experience backing it, not to mention access to world-class machines and strict quality control.
But, if you have put a lot of effort into the material and construction of the box, it can still come pretty darn close.
When should you not go with a DIY plyo box?
So, DIY-ing a plyo box is cheap and fun, but it’s not for everyone.
It requires:
1. A certain level of woodworking skill,
2. Access to some hardcore woodworking tools,
3. A good chunk out of your Netflix time.
I will explain why you need the equipment, skills, and adequate time below:
Equipment
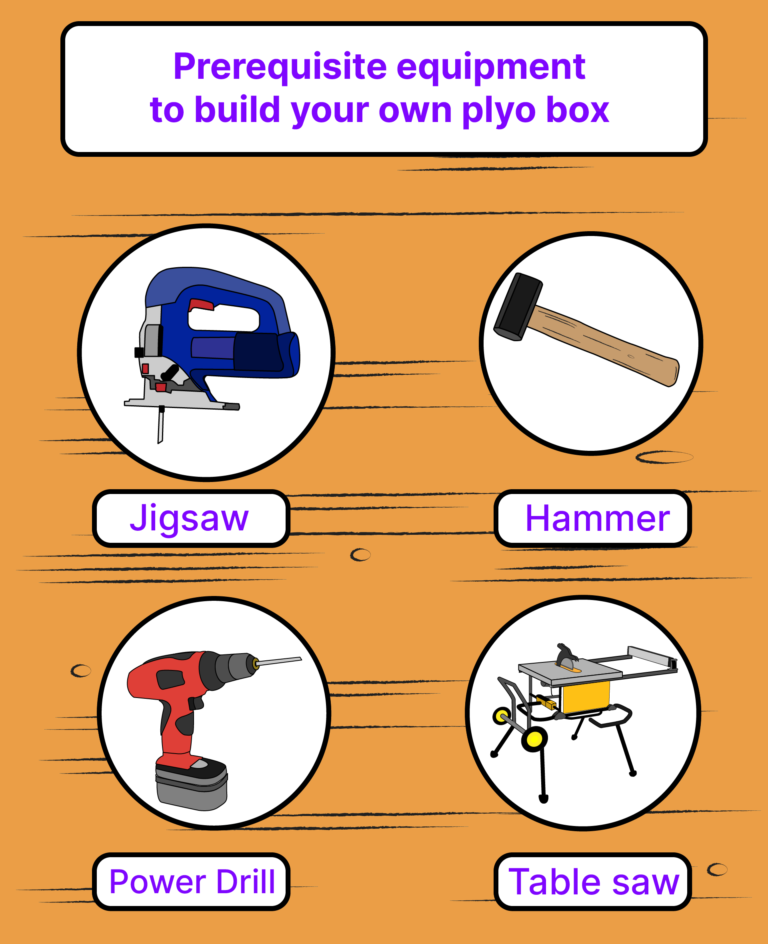
As I mentioned at the beginning, you are going to need some pretty hardcore equipment to build your dream plyo box.
You would need a drill, a hole saw, and a table saw at the very least.
If you don’t already have this equipment, and you can’t borrow it from a friend or a neighbor, you should just buy a plyo box.
The cost of the equipment alone would stretch into hundreds of dollars, and if you don’t have the equipment, you probably don’t have the skills to use them either.
More on that in the subsequent point.
Skill
Building a plyo box, albeit simple, can be a very daunting task for a newbie.
The tools involved require a certain amount of expertise and skill, and if you have no experience with drills and saws, you shoulds buy a plyo box instead of making one.
Without the prerequisite woodworking skills, you might end up putting way too much time, money, and effort into the project, not to mention the very likely scenario of hurting yourself.
High-powered machines like the table saw are known to chop off a finger or two if you are not careful with them.
The lack of skill can also be a precursor to a poorly constructed Plyo box, which is a hazard in itself.
Time
The plyo box itself takes a solid 2-3 hours of cutting, drilling, hammering, and sanding, and that’s if you have actually worked with hardware tools before and know your way around them.
For a newbie, just this part can stretch well over an entire weekend.
If you have the time for a DIY plyo box, by all means, take the project head-on.
Otherwise, you can buy a nice RepFitness plyo box and call it a day.
Conclusion
With this, we come to the end of your DIY Plyo Box project.
I bet it wasn’t as daunting or time-consuming as you thought it would be, right?
That’s the beauty of DIY projects, they often turn out to be easier than anticipated, and almost always the more economical option.
But if you found it difficult to implement, or do not have the tools, skills, or time to go through with it, this is not the end of the road for you.
You don’t have to be a woodworking aficionado to work out using a plyo box.
There are plenty of quality plyo boxes available in the market that would serve you equally well if know how to choose the right one.